
⚠️ This article is outdated and discontinued since Heroku decided to no longer offer their free tiers as this article series suggests to use in August, 2022. Please see this post for details. ⚠️
In the previous part of this series, we had a bit of a term definition to make it easier for beginners of Django to understand what I am talking about. Also, we created a Django – App called “bot” and created a URL routing for it to be available at (https://dry-tundra-61874.herokuapp.com)/bot/* (or whatever your URL looks like) and how to direct URLs to a view.
Originally, I planned to also show how to start using a database in Django to hold your bot’s data. But since the article grew larger than I anticipated before, I had to cut that down, unfortunately (sorry for that ?).
Today, I will deliver that part in its own article. We will learn how to work with databases in Django, what migrations are and how to interact with the database from within Django’s Admin-Backend.
Why do we need a database?
A database is needed to store and retrieve all data for your applications, which is neither code, nor file-like assets like pictures, audio-files, CSS, and so on. Regarding our Telegram project, a database is needed to store those parts of the JSON-Elements of Telegram messages, which are forwarded to our webhook from our Telegram bot, for instance as we saw in Part 4. We could also have our applications write this data into plain text files somewhere on our storage. But that is not a mature solution, since it does not scale well in a matter of indexing and finding pieces of information and does not deal well with concurrency. Also, since DB abstraction for many database systems is already built into Django, it’s even easier to simply make use of this than to write something on your own.
Last but not least, Django makes it easy to not have to touch a single line of SQL code, since it creates the necessary queries from pure Python code, which makes it also easy to fetch and filter data from it.
Supported database systems
I like MariaDB / MySQL / SQLite3 / Oracle better than PostgreSQL – can’t I use that instead?
Django supports a wide variety of common relational database systems (RDBS), including PostgreSQL, MariaDB/MySQL, SQLite3 and Oracle, already out of the box. If it comes to somewhat more exotic like Firebird, you need to look out for some 3rd party extension module for that (like django-firebird for example; attention: I did not test this! ⚠).
But I can absolutely not recommend doing this since the most benevolent description I can name this is experimental. Better stick with one of these built-in backends.
As already mentioned in Part 6, we will stick to PostgreSQL for various reasons, including personal preference of the author of these articles.
Will I have to write several variants of code then, for each database system I want my app to support?
Absolutely not! One of the benefits of the Django framework is that it offers an abstraction layer between your code and the database backend used, so you can easily write your code without caring for the database backend at all. You can even use something else on your workstation when you are developing locally than you use for your deployed application in production later, without changing any line of code.
For example, one common pattern is to make use of the SQLite3 database backend on your workstation, which only creates one single file for all your database content storage inside your project directory, to not have the overhead of installing and maintaining a local PostgreSQL- or MySQL-service.
Migrations
First, I need to clarify something, which I did not really pick up in a previous part of this series (Part 6): I advised you to issue the command python manage.py migrate more or less blindly, without explaining what is happening by doing that or what a migration is. Let me explain this now:
A migration is a collection of files, which are semi-automatically created by Django for you and contain SQL commands which create the database structure which is needed by Django to provide your project, so far.
“Semi”-automatically, since you still need to execute a management command which triggers Django to inspect your code and then creates these files to align the database layout to match what you have defined by it. And “so far” means, that it is not a one-shot only approach, but necessary to create additional migration-files, as soon as your model definitions change.
I will describe what that means in detail in a minute; for now, you just need to know that there are a bunch of commands built into Django, which take care of all database management for you to match the requirements of your code.
Initiate your database
To recap a bit and to have a clear state for everyone, please stop the server now if you have it running and (re-)move the file db.sqlite3 from the root of your Django project by deleting it or renaming it.
Now, your Django is in a state as if we never had initialized the database before using python manage.py migrate.
Let’s have Django searching for any necessary migrations and create them, first:
(dtbot-hT9CNosh) ~/dtbot $ python manage.py makemigrations
No changes detected
(dtbot-hT9CNosh) ~/dtbot $
None – fine. This does not mean that no change needs to be applied to the database. This only means that Django has already all migration files created to reflect your models inside of a database if they would be applied. makemigrations is about preparing migration files from your code. If there are any for you, you probably changed more than we did in this series so far on your own or deleted existing migration files. Anyways: There is no need to be concerned in that case: As long as no error is reported, you should be fine.
Next, let’s check which migrations would be applied to the database if we would issue python manage.py migrate:
(dtbot-hT9CNosh) ~/dtbot $ python manage.py showmigrations
admin
 [ ] 0001_initial
 [ ] 0002_logentry_remove_auto_add
 [ ] 0003_logentry_add_action_flag_choices
auth
 [ ] 0001_initial
 [ ] 0002_alter_permission_name_max_length
 [ ] 0003_alter_user_email_max_length
 [ ] 0004_alter_user_username_opts
 [ ] 0005_alter_user_last_login_null
 [ ] 0006_require_contenttypes_0002
 [ ] 0007_alter_validators_add_error_messages
 [ ] 0008_alter_user_username_max_length
 [ ] 0009_alter_user_last_name_max_length
contenttypes
 [ ] 0001_initial
 [ ] 0002_remove_content_type_name
sessions
 [ ] 0001_initial
(dtbot-hT9CNosh) ~/dtbot $
What do we see here? Any section heading like “admin” or “auth” represents an app, which has one or more migrations defined. These are built-in apps, which provide some core functionality for the Django frameworks, like the admin-backend for example, which we will see in a minute.
The name of these is listed in the following strings. As you can see, these are prefixed with a ‘####‘ pattern (like ‘0001*’). This is since the order of appliance is important. Each of the migrations depends on a clean state the former ones had defined. This is, why it is a bad idea to manipulate something in the database layout manually without using this migrations mechanism.
Each migration has a leading checkbox ( [ ] ), informing about the state of the migration. This reflects which of these were already applied to the database backend and which are not. In this case, none have been applied yet.
Before we (re-)create that SQLite3 database file, please add it to the list of ignored files by Git to prevent this file being added to your Git repository and gets distributed to your production servers or version control that way:
echo "db.sqlite3" >> .gitignore
So, let’s do this: Let’s apply these outstanding migrations to our new SQLite3 database by executing python manage.py migrate:
(dtbot-hT9CNosh) ~/dtbot $ python manage.py migrate
Operations to perform:
  Apply all migrations: admin, auth, contenttypes, sessions
Running migrations:
  Applying contenttypes.0001_initial... OK
  Applying auth.0001_initial... OK
  Applying admin.0001_initial... OK
  Applying admin.0002_logentry_remove_auto_add... OK
  Applying admin.0003_logentry_add_action_flag_choices... OK
  Applying contenttypes.0002_remove_content_type_name... OK
  Applying auth.0002_alter_permission_name_max_length... OK
  Applying auth.0003_alter_user_email_max_length... OK
  Applying auth.0004_alter_user_username_opts... OK
  Applying auth.0005_alter_user_last_login_null... OK
  Applying auth.0006_require_contenttypes_0002... OK
  Applying auth.0007_alter_validators_add_error_messages... OK
  Applying auth.0008_alter_user_username_max_length... OK
  Applying auth.0009_alter_user_last_name_max_length... OK
  Applying sessions.0001_initial... OK
(dtbot-hT9CNosh) ~/dtbot $
When we now check the status of the migrations again, we should notice the change in the status checkboxes which turned from [ ] to [X] , idicating that this migration already was applied :
(dtbot-hT9CNosh) ~/dtbot $ python manage.py showmigrations
admin
 [X] 0001_initial
 [X] 0002_logentry_remove_auto_add
 [X] 0003_logentry_add_action_flag_choices
auth
 [X] 0001_initial
 [X] 0002_alter_permission_name_max_length
 [X] 0003_alter_user_email_max_length
 [X] 0004_alter_user_username_opts
 [X] 0005_alter_user_last_login_null
 [X] 0006_require_contenttypes_0002
 [X] 0007_alter_validators_add_error_messages
 [X] 0008_alter_user_username_max_length
 [X] 0009_alter_user_last_name_max_length
contenttypes
 [X] 0001_initial
 [X] 0002_remove_content_type_name
sessions
 [X] 0001_initial
(dtbot-hT9CNosh) ~/dtbot $
Perfect! All are recognized as being applied! ?
Create a superuser for your project ?
If not disabled, Django comes with an admin-backend configured by default. With this, you can log in to your Django project and make some changes to the content of your database tables, manage users, etc. Before we can log in, we need to create an administrative user for this (the superuser), since by default there is none.
Create it using the following command; make sure to use some fair complexity when choosing your password, since per default, there are some password validators enabled, which prevent a user to choose too simple passwords (like being too short, being just numbers, being too similar to the username, etc.). Take note of the password you set here:
(dtbot-hT9CNosh) ~/dtbot $ python manage.py createsuperuser
Username (leave blank to use 'testuser'): mrichter
Email address: [email protected]
Password:
Password (again):
Superuser created successfully.
(dtbot-hT9CNosh) ~/dtbot $
Login to Django’s admin site
This user was now created for that Django data structure which is stored in your local db.sqlite3 file. Do not expect this to work in your production environment yet, since that is a different database.
To log in, we first need to start a local instance of our Django project either by using python manage.py runserver or heroku local ; I recommend the first one since it is the same for any hosting provider and gives a bit more info without further configuration:
(dtbot-hT9CNosh) ~/dtbot $ python manage.py runserver
Performing system checks...

System check identified no issues (0 silenced).
October 10, 2018 - 13:09:51
Django version 2.1.2, using settings 'dtbot.settings'
Starting development server at http://127.0.0.1:8000/
Quit the server with CONTROL-C.
You can navigate to the admin-backend by pointing your browser to http://127.0.0.1:8000/admin/ now, but don’t be surprised to see “Server Error (500)” in your browser and on the shell:
(dtbot-hT9CNosh) ~/dtbot $ python manage.py runserver
Performing system checks...

System check identified no issues (0 silenced).
October 10, 2018 - 13:09:51
Django version 2.1.2, using settings 'dtbot.settings'
Starting development server at http://127.0.0.1:8000/
Quit the server with CONTROL-C.
[10/Oct/2018 13:10:01] "GET /admin/ HTTP/1.1" 302 0
[10/Oct/2018 13:10:01] "GET /admin/login/?next=/admin/ HTTP/1.1" 500 27
We did nothing wrong, but again, the heroku_django – module makes it necessary to take one additional step:
Since it introduces the whitenoise – middleware (PyPi), which makes it easy to have any web-based application to keep track of its static files on its own without having to rely on complicated Apache or nginx configurations, we need to collect all static files (like CSS files, images, etc.) in a defined directory. There’s a manage.py – task for that:
First, we need to stop the Django server (CONTROL-C) and execute the following command to make sure all needed files are available at the expected location:
(dtbot-hT9CNosh) ~/dtbot $ python manage.py collectstatic --noinput

119 static files copied to '/home/testuser/dtbot/staticfiles', 375 post-processed.
(dtbot-hT9CNosh) ~/dtbot $
It’s also wise to add this folder to the .gitignore file, since this command is executed on each Heroku-deployment anyways and files in staticfiles/ are nothing that should be in the VCS:
echo “staticfiles/” >> .gitignore
When we restart the Django server again using python manage.py runserver , we should be able to access http://127.0.0.1:8000/admin/ successfully:

Using the credentials you just created the superuser with before, logging in to it should work and look somewhat similar to this:
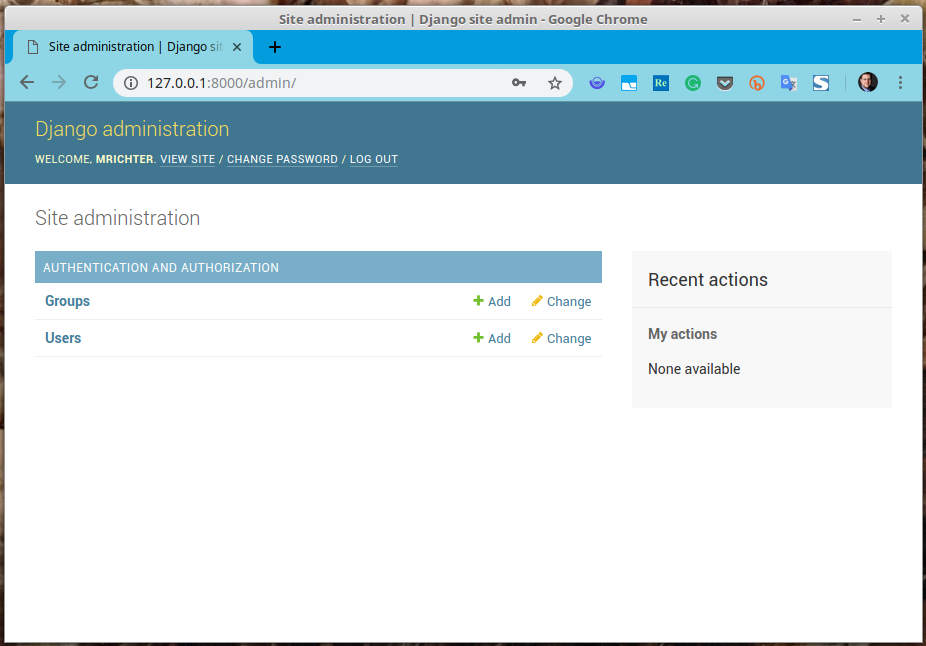
Create your models
Well, this still looks a bit boring, isn’t it? ?
Let’s populate this with something useful: Our own models to store the users your bot will accept messages from ?
Wait, what is a model?
A model is Python code which defines a data structure by creating classes which extend specific Django classes. … if I would read that sentence in a tutorial, I’d be discouraged to continue now, since it is soooo not clear to me what to do now ?. But stick with me, I will show you what I mean in an example:
Creating a model which holds your users
Once more, fire up your code editor and open the file bot/models.py . By default, it looks like this:
from django.db import models

# Create your models here.
Let’s keep our first example easy and change this to read:
from django.db import models

class User(models.Model):
    user_id     = models.IntegerField(unique=True, primary_key=True)
    first_name  = models.CharField(max_length=64)
    last_name   = models.CharField(max_length=64)
Let me explain line by line what this does:
- The first line hasn’t changed. It just imports what will be used as a basis for our models.
- In line 3 we define a new class called User, which extends the class models.Model , which we imported in the first line. This class later will be inserted into the database as a table.
- From line 4 onwards, we define the fields for our model (which later will become columns in the table of the class User . So far so clear: How this is done is the interesting part here:
The models module contains additional classes, each defining a field type. If you are familiar with SQL, you most certainly recognize this from the database definition and creation. In SQL, you need to define a skeleton for a table layout before you can add any data to them. This is not limited to naming the columns, but you also need to define the data-type for fields in that column, like “this is an integer“, “this is a string” or “this is a date“. Also, you need to define several other things which variate from data-type to data-type, like the maximal length of a string stored to a “string field” (which really is called a “CharField” in Django, but I think “string” is more commonly to understand for Pythonistas).
Here in line 4, we are defining that the column user_id inside of the table User should be an IntegerField , which must be unique (no other line in the whole table is allowed to have the same content like any other in this column) and which is a primary key (something which makes it possible to uniquely and reliably select one and only one specific row). - first_name is defined as being a CharField . Char fields are used to store strings which are not considered “large”. Otherwise, it’s encouraged to use a TextField instead.
This mainly is not so very relevant for the database, but for Django, since this type decides what kind of input field is used to edit these fields in forms: When smaller text strings are expected, like a name or a state name, then a form should offer a one-line input field to ask for this. If it’s a whole article for a blog or similar, than a whole input-box should be rendered instead. Django decides this depending on this field type you define here.
Since we do not expect any first_name to extend 64 characters, we add max_length=64 as an argument here. The reason why you limit this in SQL usually is that the RDBS reserves a specific amount of storage for each line of this table which is always the same size, no matter if the value is 6 or 64 characters long. The more you define here which remains unused, the more “waste” of storage and performance you risk here. This might not appear like the worst thing for a user table, but for tables which soon contain millions of rows, it becomes relevant quite quickly. So take this as “good practice” advice. - Exactly the same like in line 5 here.
What have we just done and why?
With this background, you surely can tell what we just did here: We defined a database table named “User” which holds some or many records consisting of 3 pieces of information per set:
- a numeric user id
- an up to 64 characters string for a first name
- an up to 64 characters string for the last name
The idea is: When you operate a bot on Telegram, everyone can send messages to that, right? So: Whatever your bot should do, you eventually do not want it to process messages from everyone but only to a fixed list of users. This depends on the intention of your bot: If it should be a public service for everyone in the world, which sends everyone who registers to it a message when a new article was published, you do not need to limit who can do that.
If you are planning to create a bot which tracks some household-cash-information for just a few people (like we do in this article series), then you definitely do not want that everybody can ask your bot to “add 1000 ? for cocaine” to your and your wife’s monthly calculation.
Let’s have a look at the JSON data which Telegram sends to the Webhook of our bot as described in Part 4:
{'message': {'chat': {'first_name': 'Marc',
                       'id': REMOVED,
                       'last_name': 'Richter',
                       'type': 'private'},
              'date': 1533248344,
              'from': {'first_name': 'Marc',
                       'id': REMOVED,
                       'is_bot': False,
                       'language_code': 'de',
                       'last_name': 'Richter'},
              'message_id': 4,
              'text': 'Test'},
  'update_id': 941430900}
Where it says REMOVED here, normally a numerical, unique number is listed, which definitely identifies a specific user in Telegram. The plan is, that this value can be entered as user_id in the User table to decide in your code if you process an incoming message (like storing it in the database, send a reply, add the received numbers to your monthly sum, …) or not.
We will see how this can be done later. For now, let’s get familiar with database modeling, first.
Register the app to Django
For a start, this is enough to enable Django to create a migration for it. But if you execute python manage.py makemigrations now, you will notice that Django states No changes detected .
This is because Django does not know about your app yet. If you remember from Part 7, the python manage.py startapp bot command just creates a new folder which holds some files; none of the existing files is altered to make Django aware of this new app folder. Thus, we need to do that now, after the initial preparations were made.
Once more, edit settings.py and head for INSTALLED_APPS . You will notice that this contains some built-in apps by default already. We add our app to this list now to make it look like this:
INSTALLED_APPS = [
    'django.contrib.admin',
    'django.contrib.auth',
    'django.contrib.contenttypes',
    'django.contrib.sessions',
    'django.contrib.messages',
    'django.contrib.staticfiles',
    'bot.apps.BotConfig',
]
Having the migrations created and applied
If you now fire up python manage.py makemigrations , a migration for our model definition should be detected and created:
(dtbot-hT9CNosh) ~/dtbot $ python manage.py makemigrations
Migrations for 'bot':
  bot/migrations/0001_initial.py
    - Create model User
(dtbot-hT9CNosh) ~/dtbot $ ls -l bot/migrations/
total 8
-rw-rw-r-- 1 testuser testuser  536 Oct 10 17:01 0001_initial.py
-rw-rw-r-- 1 testuser testuser    0 Sep 21 22:06 __init__.py
drwxrwxr-x 2 testuser testuser 4096 Oct 10 17:01 __pycache__
(dtbot-hT9CNosh) ~/dtbot $
If this has worked well, we can apply that migration and by that, have the table created in the database:
(dtbot-hT9CNosh) ~/dtbot $ python manage.py migrate
Operations to perform:
  Apply all migrations: admin, auth, bot, contenttypes, sessions
Running migrations:
  Applying bot.0001_initial... OK
(dtbot-hT9CNosh) ~/dtbot $
Let’s have a look at the database! ?
What has all this caused? Let’s have a look!
With the following commands, I’m connecting to the SQLite3 database file db.sqlite3 and list its content:
(dtbot-hT9CNosh) ~/dtbot $ sqlite3
SQLite version 3.23.1 2018-04-10 17:39:29
Enter ".help" for usage hints.
Connected to a transient in-memory database.
Use ".open FILENAME" to reopen on a persistent database.
sqlite> .open db.sqlite3
sqlite> .tables
auth_group                  bot_user
auth_group_permissions      django_admin_log
auth_permission             django_content_type
auth_user                   django_migrations
auth_user_groups            django_session
auth_user_user_permissions
sqlite> .schema bot_user
CREATE TABLE IF NOT EXISTS "bot_user" ("user_id" integer NOT NULL PRIMARY KEY, "first_name" varchar(64) NOT NULL, "last_name" varchar(64) NOT NULL);
sqlite> .quit
(dtbot-hT9CNosh) ~/dtbot $
Ignore the other tables for now; these come from the built-in apps migrations.
What is interesting here is that our table User ends up as bot_user in the database. This can be changed, but normally, this is quite a meaningful default: The name is lowercased and prefixed by the name of the app + “_”, so everyone can see what a table belongs to, immediately.
The CREATE TABLE is plain SQL. We will find all our models definitions in that query.
How to enter data to this?
We either could already use Python code to do this or we could do so, using the admin backend, first. Let’s do the latter, since entering data by Python code will be done a lot later when we are storing our messages. This way, we learn to know both ways.
Launch your Django server and head for the admin backend at http://127.0.0.1:8000/admin/ . You will notice that nothing has changed yet. This is because we first need to register our modules to the admin backend.
This is done by editing the file bot/admin.py to look like this:
from django.contrib import admin
from .models import User

admin.site.register(User)
Save this, restart the server and hit the admin backend again; you should notice another section called “BOT” is listed now, containing one element called “Users”:
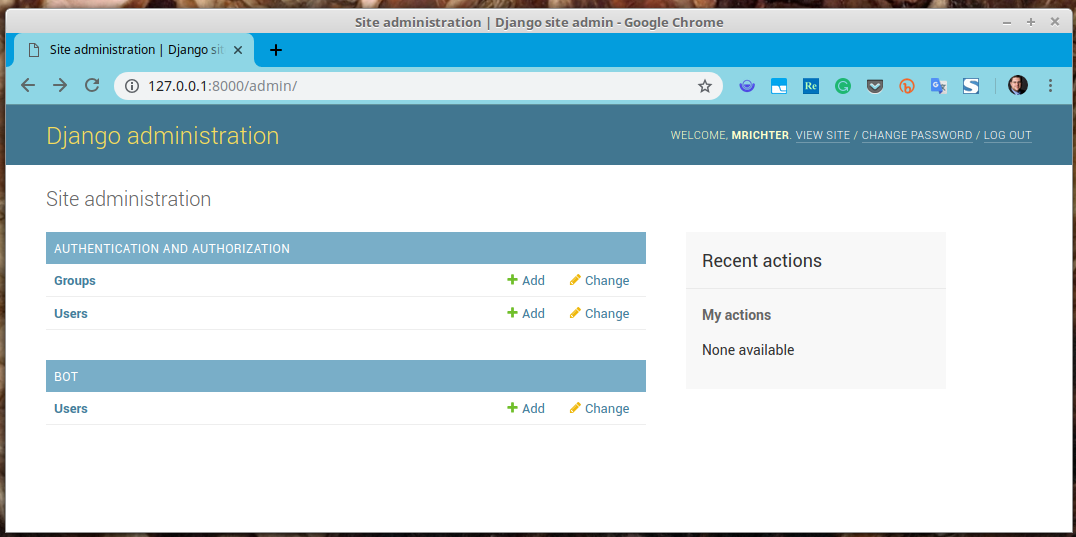
This is our model!! ?
Let’s click that “Users” link. You will see a more or less blank page, stating “Select user to change“. Pretty not impressing without any record ready to get edited. But there’s also a button at the upper right corner labeled “ADD USER” – let’s click that!
You will get shown a form, which asks for 3 things:
- User id
- First name
- Last name
You may start by doing some experiments with this:
- From what we know, the “User id” should only be capable to store integers, since we defined that field to be of type IntegerField . Try to save something else: A float, a string, whatever.
- “First name” and “Last Name” should allow 64 characters max. Try to store a string which is 65 characters long and see what happens (take a close look, comparing both strings).
- From the SQLite3 schema, we know that all three fields got created with NOT NULL , which means they must not be blank. Try if you can only fill two fields and get away with saving.
When you are done experimenting with this, delete all records again.
Make it pretty ?
It may have come to your attention that a record which is created is displayed in the record overview as “User object (#)“. I do not like that. I’d prefer it to be “First_name Last_name”. Let’s change that!
Create at least one record, so that you have at least one, so we can see the effect.
Edit your models.py file once more and overwrite the __str__ – function of the class Users by changing it like this:
class User(models.Model):
    user_id     = models.IntegerField(unique=True, primary_key=True)
    first_name  = models.CharField(max_length=64)
    last_name   = models.CharField(max_length=64)

    def __str__(self):
        return f'{self.first_name} {self.last_name}'
Save this, restart the Django server and reload the admin backend; “User object (#)” should now be displayed like whatever you did choose as “First_name Last_name” when you created those records.
Example of how __str__ works
In case you do not know what __str__ does: It defines how an object is represented if it is displayed with the print() – function, for example. Let’s see an easy example of this:
>>> class foobar():
...     def __init__(self, name, mood="Good"):
...         self.name = name
...         self.mood = mood
...
>>> a = foobar('Carl')
>>> print(a)
<foobar object at 0x7f8cf4c94cc0>

>>> class foobar():
...     def __init__(self, name, mood="Good"):
...         self.name = name
...         self.mood = mood
...     def __str__(self):
...         return f"Hi, I'm {self.name} and my mood is {self.mood}!"
...
>>> b = foobar('Curt')
>>> print(b)
Hi, I'm Curt and my mood is Good!
>>>
Outlook for the next part of the series
Phew – again, this turned out to become a quite exhaustive article! Again, let’s make a stop to it before it becomes even longer.
We just learned about what a database is, what it’s good for, what database systems are supported by Django and how to utilize a database in your Django apps and how to use the admin-backend to manipulate the records in the database. Also, we learned what “migrations” and “models” are.
In the next article of this series, we will see how these new moves can be used in our Python code to receive and store messages and how you can interact with your database from your Python code.
If you liked or disliked this article, I’d love to read that in the comments!
Enjoy coding!
Born in 1982, Marc Richter is an IT enthusiast since 1994. He became addicted when he first put his hands on their family’s PC and never stopped investigating and exploring new things since then.
He is married to Jennifer and a proud father of two wonderful children.
His current professional focus is DevOps and Python development.
An exhaustive bio can be found in this blog post.